Because of some (self-induced) communication difficulties with the city, the workshop we built in our backyard was done with two permits. These are scans of the drawings that were approved for the first permit, you'll notice the big red "X" over the electrical portion, and the "not a habitable structure". More notes from my own planning process at Workshop Notes.
A few things I did wrong here: First, I called it a shed, not a workshop. Second, I could have had better details about the foundation structure, or at least called out that it was a 18" thick grade beam supporting a 6" slab. The city thought it was going to be some sort of beam over support pier thing which didn't make any sense for the weight the rest of the building was engineered for.
And I went in low on the estimated cost for this. The permit fees were such a pitiful portion of the actual cost I should have estimated high, though I think these estimates weren't far off in reality, so we agreed to pad the electrical permit estimates by quite a bit.
With the electrical permit, I also had to make the structure Title 24 compliant, which meant climate control. Yes, my shop has heating and air conditioning. If that had been called out earlier on, I could have made the structure more efficient (the main thing I would have added was a layer of insulation under the slab).
I was also struggling with my scanner a bit on these, so they ended up slightly lower res than I'd like. However, I think they're still readable. And I didn't scan anything that could be copyrighted, including the engineering drawings and calculations from Scott Parker, and the truss drawings from American Truss Company.
side view of the workshop, showing an overview of the structure. Note the callout on the left of staggered studs for noise reduction, and that I didn't show the front grade beam here, which contributed to the confusion
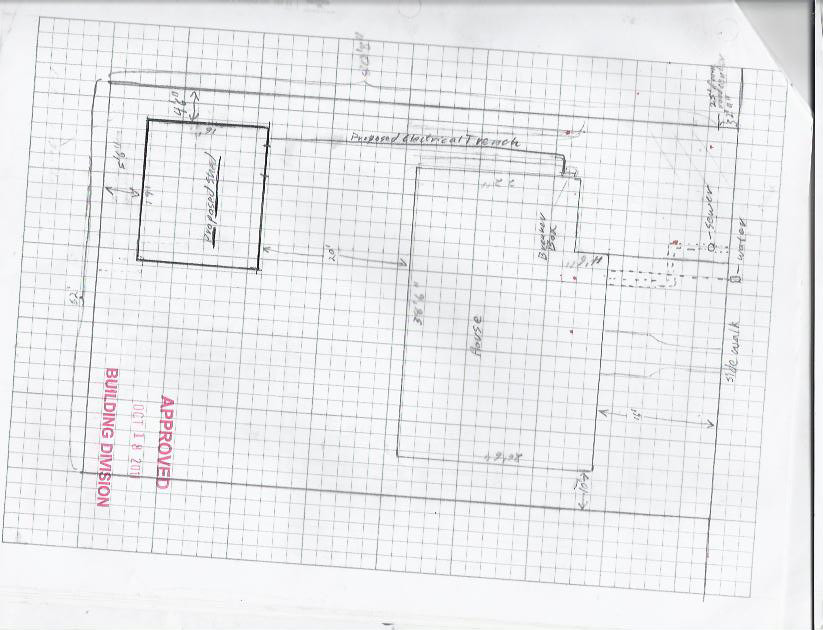
Lot layouts, calling out setbacks and separations
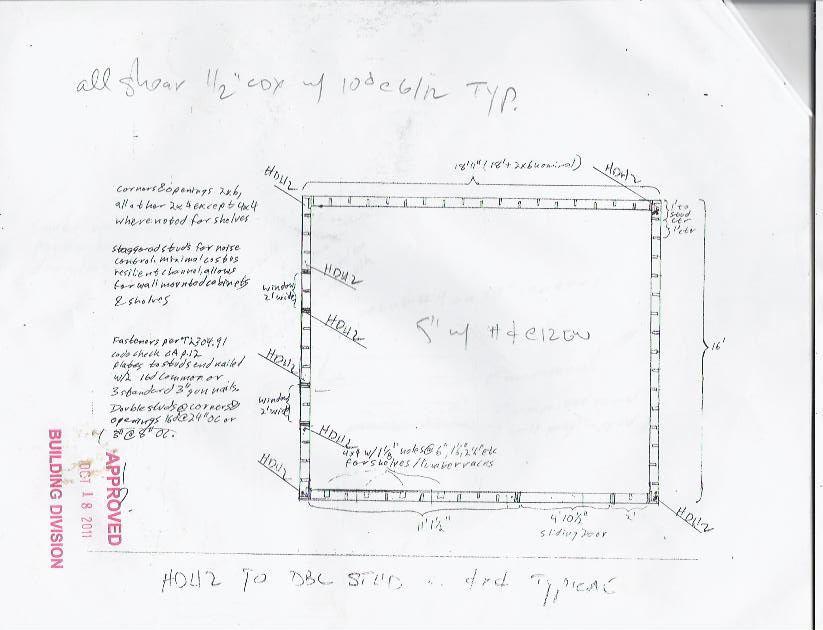
Wall assembly details, with a few notes from Scott Parker. Note that Scott called out the shear wall sheathing, ½" CDX plywood with 10d nails at 6" spacings along the edges, 12" spacing along studs in the center, and the Simpson HDU2 seismic anchors, but didn't call out the wall anchors generally here. This was slightly confusing.
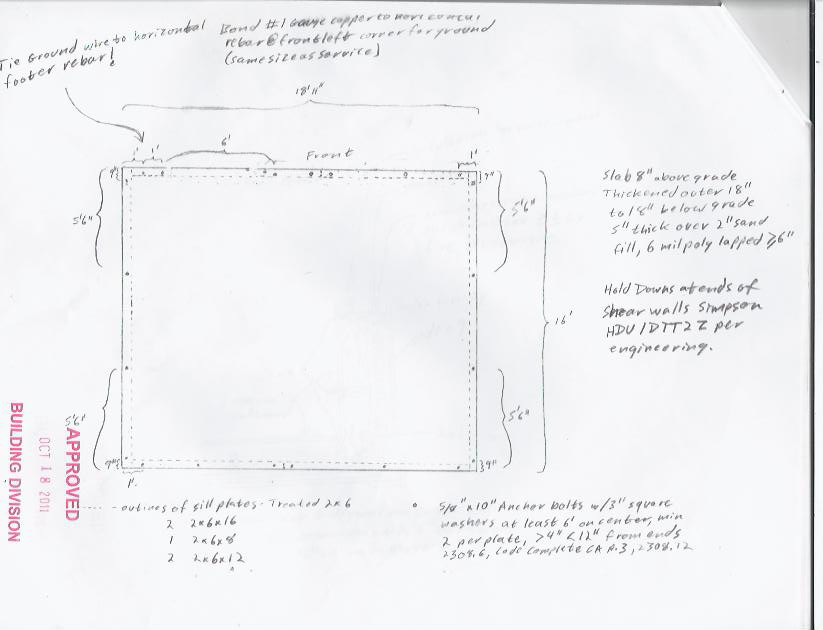
Foundation details. Note my comment above about insulation under the slab. Also, because of interactions with the aluminum flashing and the acids in the treated sill plate, I had to add a layer of foam between the flashing and the sill plate.
Calls out the locations of the sill plate ties, note that I should have been more careful about this, we had to reposition a stud or two and that's a pain in the ass.
Wall assembly detail. Note the "drainage plane" construction, the air gap between the house wrap outside of the wall sheathing and the siding. This is in use in places with high winds, and actually stems from techniques in England to build bomproof buildings during the IRA struggles, but my California inspector wasn't familiar with it.
Roof assembly. It ended up kind of like this, rather than the T&G decking (left over from when I was going to try to do a more decorative truss assembly with wider spacing) I used ¾" ply, and the drip edge is done with flashing over treated lumber.
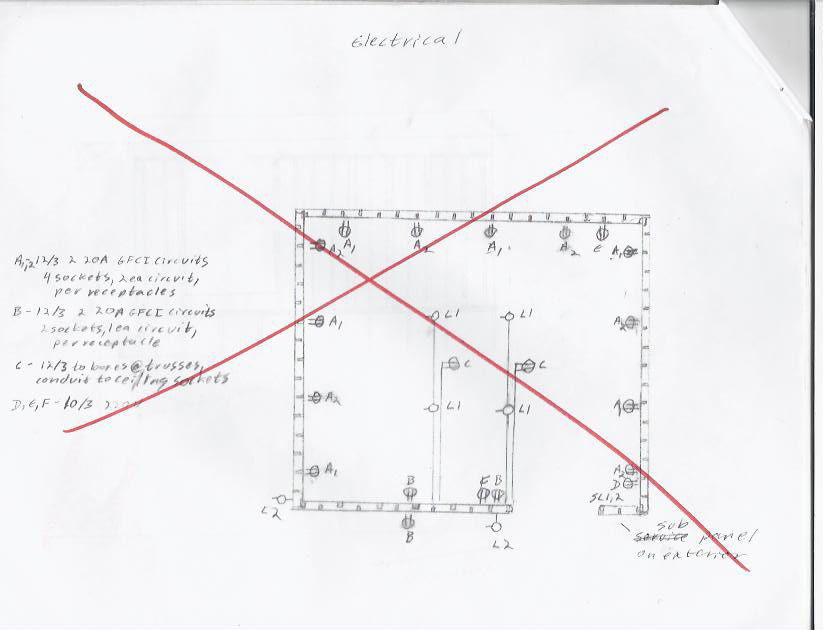
The electrical page that got nixed that is in fact close to what I finally installed. I ran the lighting circuits differently, and ended up with another circuit for the heat pump along with callout E. The weird bit is that I ran a 220v #10 circuit for the heat pump, and the wires on the heater were these wussy little #14 stranded things. Plan for the future!
Front view. The only weirdness here is that those wide studs are 4x4s with holes drilled in them into which I put black steel pipe for a lumber rack. Height specified for planning.
The end with the windows, height and note of Hardiplank for planning. Oddly the one thing people didn't ask me to prove was the 1 hour wall assembly requirement for buildings within some distance of the property line, over and above the basic setback distance. I was pretty confident in my wall assembly, but I kind of expected that I'd have to get an engineer's signature on it.


